Quickstart Guide
Welcome to PlaySafe!
This guide will walk you through installing and setting up the PlaySafe Unity SDK in your project.
Prerequisites
Before we begin, make sure you have the following:
- Unity 2021.3 or a higher version installed.
- A PlaySafe App Key. Need one? Reach out to the PlaySafe team at [email protected] or visit the PlaySafe Dashboard if you already have an account.
Installation & Setup
Follow these steps to integrate the PlaySafe SDK into your Unity project.
Step 1: Import the SDK via Package Manager
The easiest way to install the SDK is directly from its Git repository using the Unity Package Manager.
-
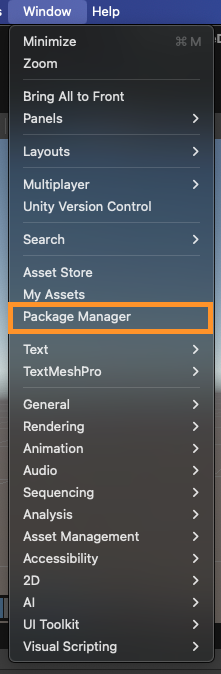
In your Unity Editor, go to Window > Package Manager.
-
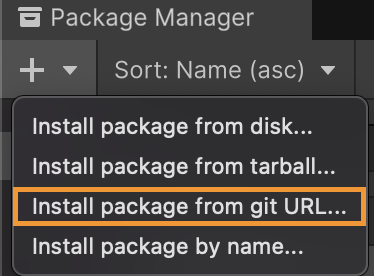
Click the '+' (plus) icon in the top-left corner of the Package Manager window.
-
Select "Add package from git URL..." from the dropdown menu.
-
Enter the following Git URL into the text field:
https://github.com/dogelabsvr/PlaySafe-UnitySDK.git -
Click Add. Unity will now download and import the SDK package into your project.
You should see the PlaySafe SDK listed under your project's Packages folder once the import is complete.

Step 2: Set up the PlaySafe Manager
The SDK requires a dedicated GameObject in your scene to manage its operations.
-
In your Hierarchy window, create a new empty GameObject. Right-click in the Hierarchy panel and select Create Empty.
-
Rename this new GameObject to
PlaySafeManager.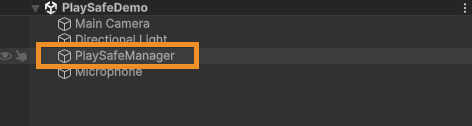
-
With the
PlaySafeManagerGameObject selected, go to the Inspector window. -
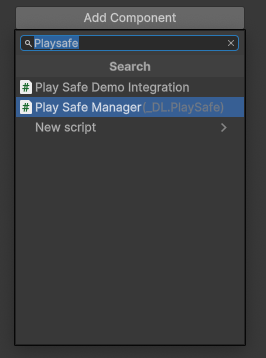
Click Add Component.
-
Search for
PlaySafeManagerand select the script to add it as a component.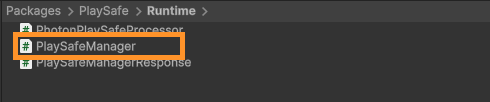
Step 3: Configure the PlaySafe Manager
Now, let's configure the PlaySafeManager component with your App Key.
-
Select the
PlaySafeManagerGameObject in your Hierarchy. -
In the Inspector, you'll see the
PlaySafeManagercomponent with several fields. The most important one is theApp Key.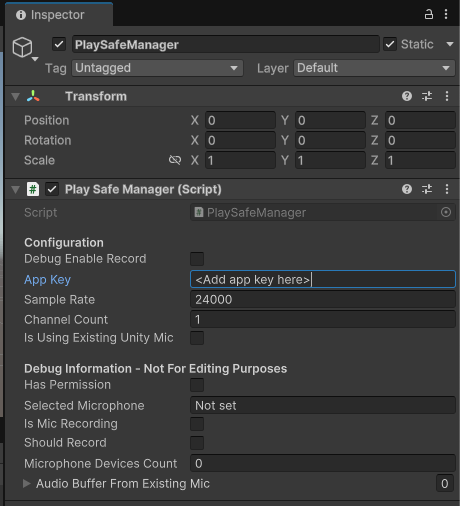
-
You'll need to paste your unique PlaySafe App Key into this field. If you don't have one yet, follow the next step!
Step 4: Generate Your App Key (If Needed)
If you haven't generated an App Key yet, here's how to do it from the PlaySafe Dashboard:
-
Log in to your PlaySafe Dashboard.
-
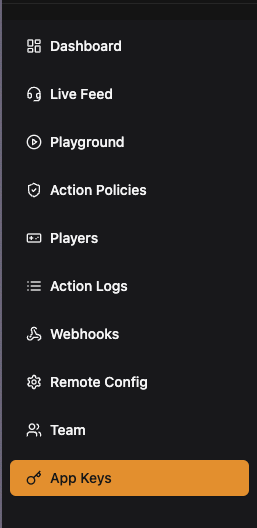
Navigate to the App Keys section using the sidebar menu.
-
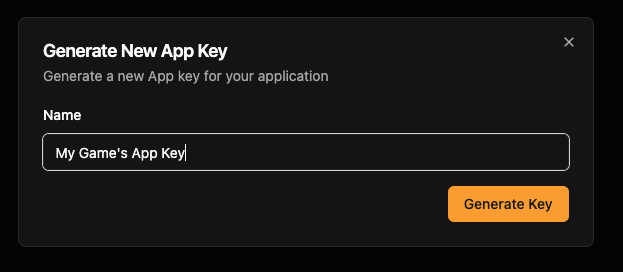
Click the Generate App Key button.

-
A dialog box will appear that allows you to create your new app key. Once generated, click the Copy button to copy it to your clipboard. Make sure to store this key securely, as it won't be shown again.
-
Go back to the Unity Editor, select your
PlaySafeManagerGameObject, and paste the copied key into theApp Keyfield in the Inspector.
Testing the Integration
The SDK package includes a demo scene to help you verify that everything is set up correctly.
-
Navigate to the
Packages/PlaySafe/Samplesfolder in your Project window.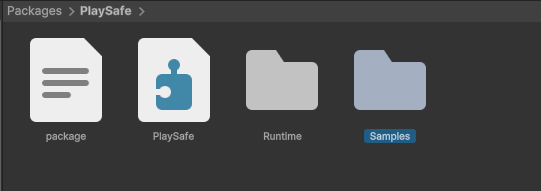
-
You'll find the demo assets, including the
PlaySafeDemoscene. You can either test the demo by copying this scene into yourAssetsfolder (if you're just looking around and trying to understand how PlaySafe works), or by adding thePlaySafeDemoIntegrationscript to yourPlaySafeManagerGame Object.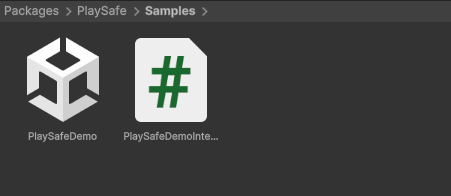
3a. If you do choose to open the PlaySafeDemo scene:
- Ensure the
PlaySafeManagerGameObject in the demo scene has your App Key pasted into its configuration in the Inspector (similar to Step 3 & 4 above, but for the GameObject within the demo scene). The demo scene already contains aPlaySafeManagergame object.
3b. If you instead would like to integrate PlaySafe into your game, then follow this:
-
Add the the
PlaySafeDemoIntegrationscript to thePlaySafeManagerGame Object.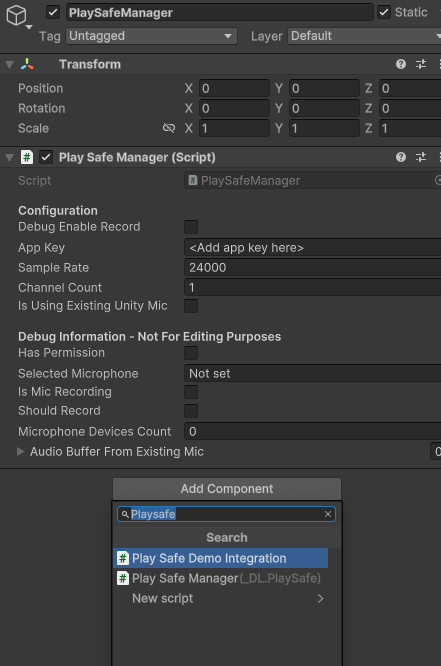
-
On the PlaySafeDemoIntegration component created, assign the PlaySafeManager script to the
Play Safe Managerreference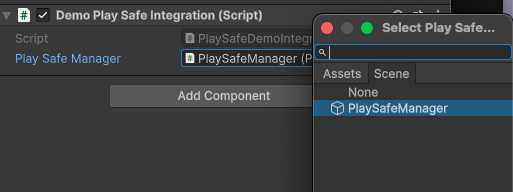
-
Enter Play mode in the Unity Editor.
-
Interact with the demo scene as intended (this might involve triggering voice input if the demo supports it).
-
Check the Unity Console window for logs from PlaySafe. You should see messages indicating that PlaySafe has initialized and is processing audio (if applicable).
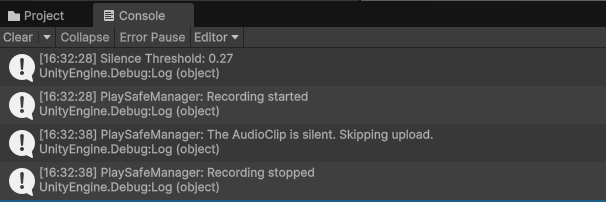
-
Go back to your PlaySafe Dashboard and navigate to the Live Feed section.
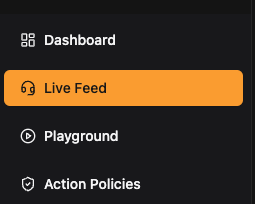
-
You should see data coming in from your Unity application, confirming that the SDK is successfully communicating with the PlaySafe backend.

If you see logs in the Unity console and data appearing in your PlaySafe dashboard, congratulations! You've successfully integrated the PlaySafe SDK.
Integrating the SDK
The PlaySafeDemoIntegration.cs file serves as your starting point for integrating PlaySafe into your game. Here's what it includes:
Core Integration Methods
The integration requires implementing three essential methods:
1. CanRecord() - Define when PlaySafe should record audio
private bool CanRecord()
{
    // Example settings to choose when to listen to microphone
    bool IsMicrophoneMuted = false; // TODO: Replace this with your game logic
    bool IsInMultiplayerLobby = true; // TODO: Replace this with your game logic
    int playerCount = 3; // TODO: Replace this with your game logic

    return !IsMicrophoneMuted &&
           IsInMultiplayerLobby &&
           playerCount >= 2;
}
2. GetTelemetry() - Provide player and session information
private PlaySafeManager.AudioEventRequestData GetTelemetry()
{
    string userId = "1234"; // TODO: Replace with your actual user ID
    string roomName = "ExampleRoom"; // TODO: Replace with your actual room ID
    string userName = "ExampleUser"; // TODO: Replace with your actual username
    string language = Application.systemLanguage.ToString();

    return new PlaySafeManager.AudioEventRequestData()
    {
        UserId = userId,
        UserName = userName, // Optional but encouraged for dashboard search
        RoomId = roomName,
        Language = language,
    };
}
3. OnPolicyViolationEvent() - Handle moderation actions
Note:
OnPolicyViolationEvent()was previously calledOnActionEvent()in earlier versions (before 0.10.0) of the SDK
private void OnPolicyViolationEvent(ActionItem actionEvent, DateTime serverTime)
{
    string duration = actionEvent.DurationInMinutes >= 60 ?
        $"{(actionEvent.DurationInMinutes / 60f).ToString("F1")} hours" :
        $"{actionEvent.DurationInMinutes} minutes";

    Debug.Log($"Voice chat disabled for {duration}. This can happen due to using slurs, fighting, or general disrespectful behavior");

    DateTime bannedUntil = serverTime + System.TimeSpan.FromMinutes(actionEvent.DurationInMinutes);

    // TODO: Add your game-specific logic here
    // For example: DisableVoiceChat(bannedUntil);
}
Using Async API Methods
The SDK provides several async methods for advanced functionality:
Player Status Checking
var playerStatus = await playSafeManager.GetPlayerStatusAsync();
Debug.Log($"Player has violation: {playerStatus.Data.HasViolation}");
Sensei Poll Management
// Get active poll for a persona
string personaId = "your-persona-id"; // From PlaySafe dashboard
var poll = await playSafeManager.GetActivePollAsync(personaId);

// Cast a vote
if (poll != null && poll.Data != null)
{
    var vote = await playSafeManager.CastVoteAsync(poll.Data.Id, "yes");
    var results = await playSafeManager.GetPollResultsAsync(poll.Data.Id);
}
Setup Process
- Copy the
PlaySafeDemoIntegration.csfile into your project - Modify the
GetTelemetry()method to return your actual user and room data (including UserName if you would like to be able to search by username in the PlaySafe dashboard) - Update the
CanRecord()method to match your game's voice chat conditions - Implement your game-specific logic in the
OnPolicyViolationEvent()method - Set up the
OnPlaySafeInitializedcallback if needed (check the demo integration file'sStart()method for context on how this would work). - Assign the script to your PlaySafeManager GameObject and link the references
For detailed API documentation, see the API Reference section.
Advanced Integrations
Photon Voice Integration
PlaySafe includes robust support for Photon Voice, providing reliable voice moderation in Photon-powered multiplayer games. The integration has been enhanced with improved singleton pattern implementation to eliminate timing issues during initialization.
Key Features:
- Reliable Photon Voice Recorder integration with improved initialization handling
- Real-time voice moderation within existing Photon Voice workflows
- No additional setup required - works automatically when both SDKs are present
- Enhanced singleton pattern prevents race conditions during startup
- Conditional compilation ensures compatibility without Photon Voice dependencies
Recent Improvements:
- Fixed timing issues where Photon Voice Recorder could initialize before PlaySafeManager
- Enhanced singleton pattern implementation for more reliable integration
- Improved stability during multiplayer session startup
Usage: The integration activates automatically when:
- Your project includes Photon Voice SDK
- The
PHOTON_VOICE_DEFINEDpreprocessor directive is set - Photon Voice creates a LocalVoiceAudioFloat instance
You will need to call the SetupPhotonVoice(PhotonVoiceCreatedParams) method in your Photon PhotonVoiceCreated event logic after initializing PlaySafe to avoid initialization timing conflicts with PlaySafe.
Example:
// In your Recorder class or equivalent where Photon voice is used
#if PHOTON_VOICE_DEFINED
// init PlaySafe once we set up photon voice; called from Photon's Recorder via SendMessage
public void PhotonVoiceCreated (PhotonVoiceCreatedParams voiceCreatedParams)
{
    PlaySafeManager.Instance.SetupPhotonVoice(voiceCreatedParams);
}
#endif
Next Steps
Now that the SDK is installed and tested, you can start integrating its [features](todo: add features) more deeply into your game. Explore the other documentation sections to learn about:
- Recording and processing audio events for toxicity detection.
- Handling moderation events (reports & mutes).
- Customizing SDK behavior.
- Photon Voice integration for advanced multiplayer voice chat scenarios.
In case of anything, feel free to reach out to us at [email protected] or via Discord.